Quantcast
Channel: Exercising Sitecore
Viewing all 29 articles
Browse latest View live

Sitecore Marketplace Module – MasterKey

$
0
0

MasterKey – Unlock Sitecore Items en masse

So pretty exciting news! My first Module has just become available on the Sitecore Marketplace;

https://marketplace.sitecore.net/Modules/MasterKey.aspx

It is inspired by the struggles one of the QA guys I work with who had the joy of going through and unlocking folders and folders of items locked by a Content Editor’s account.

It has been built from the ground up for Sitecore 8 but I have developed for backwards compatibility and I have tested as far back as 7.0 but foresee it working without issue in Sitecore 6.

How to Install

Really simple install, download the Module from the Sitecore Marketplace. The module only needs to be installed via the Package Installer from the Sitecore Desktop. Follow the installer instructions and if there are prompts to install Items agree.

The package is lightweight with three new Items added to the Core database and two physical files, the MasterKey.dll residing in the bin and MasterKey.config which installs into the Includes folder within the App_Config directory.

Unlock Children

The first feature of the Module is to a new Button in the Review Tab of the Content Editor Ribbon. The button looks at the Item in context and loops through its Child Items to determine if any are locked and can be unlocked by the User in Context at that point in time. If that is the case the button is enabled.

Master Key Ribbon Items

On clicking the button it begins the uiUnlockChildren pipeline defined in the config file. Which completes the checks again before looping through unlocking the item. Once completed a unlock report will be prompted outlining how many were unlocked, how many could not be unlocked and which items can not be unlocked due to permissions.

Master Key Unlock Child Items Report

Unlock Item

From unlocking Child Items it make sense give the option to unlock the Item in Context. However after unlocking the Context Item it runs the uiUnlockItemsChildren pipeline to determine if any suitable Child Items are unlockable and if there are to prompt the user to ask if they should also be unlocked.

Master Key Prompt to Unlock Children

If Yes the pipeline continues and unlocks the Child Items and produces the same report as above. If the user chooses No, Cancel or exits the pipeline is aborted and no child items are unlocked.

Unlockable Items

Finally for ease of use the Module includes a new Gutter Item – Unlockable Items. As the name suggests if an Item can be unlocked by the User in Context they will see the Key icon in the Gutter.

Master Key Unlockable Items Gutter and Icon

Clicking the Icon triggers the same pipeline as the Unlock Item ribbon button; unlocking the Item in context, checking for unlockable children and prompting the User to unlock child items if there are any that can be unlocked.

And that’s it!

The module itself follows the same rules of locking and unlocking items in Sitecore; account hierarchy – Content Editors being unable to unlock locked Items by the Administrator, unlocking while editing – correctly handles the changes made etc.

Thinking about future versions of the Module will be largely based on feedback as well as providing features to search for Items locked by users and the ability to unlock one, many or all. I imagine this will be build on SPEAK so will be an issue for backwards compatibility.

The code

The code can be found on GitHub on the link below but I’ll post a blog about the architecture and design principles that work well for building Sitecore Shared Source Modules.

https://github.com/islaytitans/MasterKey


Quick Start Guide: Sitecore Personalisation Getting it working

$
0
0

Sitecore Personalisation – Getting it working

I’ve been browsing around Sitecore forums and resources and there are often devs posting about Personalization not working working for their site or how to customise their site in a given scenario.

The thing is the former is fairly straight forward with a little guidance and the latter can be achieved with some knowledge and examples. Therefore I thought I’d help the community out by posting a short series of Quick Start Guides on everything from getting Personalization working to dynamically changing content and altering the site based on conditions.

I’ll start with everything that you need to do to get Personalization working in your site.

1. Analytics Database

The most fundamental thing you will need to confirm is that you have the Sitecore Analytics database installed. If you have used the Sitecore Installer to create your instance the database will be in MSSQL if you are running Sitecore 7.2 or less and in MongoDB if you’re running Sitecore 7.5 or above.

If the database is not present you will likely need to download install Sitecore DMS from the Sitecore Developer Network for your version of Sitecore.

2. Connection strings

After you have confirmed your Analytics database is present you will want to check a connection strings has been defined for it and has the correct username and password to access it.

The most effective way to confirm the username and password grants access to the database is to use those credentials to login and confirm you can read data from the database’s tables. If this doesn’t work you will need to grant the account to have access to the database or use a different account that can.

The connection string will be defined in the ConnectionStrings.confilg file in the App_Config folder folder of your webroot.

In Sitecore 7.2 or less the connection string will be a SQL connection string see below

<add name="analytics" connectionString="user id=jRobbins;password=SafePassword;Data Source=ServerAddress;Database=Sitecore.Analytics"/>

For Sitecore 7.5 and above the connection will be a MongoDB connection string, like below

<add name="analytics" connectionString="mongodb://ServerAddress/analytics"/>

An additional check for Sitecore 7.5 and above is that the Sitecore.Analytics.config file has a reference to this connection string.


<dataAdapterManager defaultProvider="mongo">
    <providers>
        <clear/>
        <add name="mongo" type="Sitecore.Analytics.Data.DataAccess.MongoDb.MongoDbDataAdapterProvider, Sitecore.Analytics.MongoDb" connectionStringName="analytics"/>
    </providers>
</dataAdapterManager>

3. Enabling analytics

Now that you have confirmed analytics is installed and correctly set up its time to turn it on.

In the App_config/Includes folder your webroot you will need to find the file Sitecore.Analytics.config. If you can’t find it it may be missing from the environment or DMS has not been installed, see above.

In this file you will need to confirm that the Analytics is enabled and is allowing reads and writes to the database. The required settings are shown below


<!-- ANALYTICS DISABLE DATABASE Disables the database so that no reading or writing to the database occurs. Default: false -->
<setting name="Analytics.DisableDatabase" value="false" />

...

<!-- ANALYTICS ENABLED Determines whether analytics is enabled or not. Default: true -->
<setting name="Analytics.Enabled" value="true" />

Finally you will want to enable Analytics for the sites you wish to have personalization on. This is achieved via the enableAnalytics property of a site in the node of the web.config.


<site name="website" virtualFolder="/" physicalFolder="/" rootPath="/sitecore/content" startItem="/home" database="web" domain="extranet" enableAnalytics="true" enablePreview="true" enableWebEdit="true" enableDebugger="true" disableClientData="false" />

 4. Enabling Personalisation options

Finally you now need to set Sitecore so that it displays the options to personalize your site.

To do this log into the Content Editor of your site and click the Sitecore logo, or the Menu Icon in Sitecore 8, to access the Instance properties. Then you will want to click ‘Application Options’.

Sitecore Application Options

In the Application Options model select the View tab and check the ‘Show the Personalization section’ checkbox and press okay.

Application Options - Show personialisation section

Now you will be able to see the Personalization button in the Presentation Details modal via the Content Editor.

Presentation Details - Personalise

In the Page Editor, or Experience Editor if you are using Sitecore 8, you’ll see the Personalization button in the Command pop-up.

Page Editor - Personailisation

And that’s it!

You are now up and running to create a personalized experience for your users!

The next post in the series will cover how to dynamically change your site’s content to better suit individuals and scenarios.


Quick Start Guide: Dynamic Content via Sitecore Personalization

$
0
0

Sitecore Personalisation – Automatically changing content

In the previous post I covered how to get personalization working correctly for your site. Now its time to start doing something exciting.

With Personalization working the next step is to structure your content so that it is in the form of reusable blocks and develop Sitecore sublayouts to dynamically display these blocks of content.

In this post I’ll go over the basics to achieve this and get you giving personalised experiences like a pro.

The Datasource Field

Essentially personalization of content works by varying the Item referenced in the Data Source field of the Sublayout based on when a rule has been met.

Fundamentally this means the content you are referencing should be a self-contained Sitecore Item not fields of the Item in context. This allows the content be swapped with content of a similar type without reworking of content/code and used throughout the site.

For example, below I have created one such self-contained Item which holds content for a promotion with a Call to Action to get the user to complete some action on the website.

Promo Object

I want this content to display in a Promotional Panel on a page, so for the Sublayout I add a reference to Item in the Data Source field of the default Personalization condition.

Personalistion Default Condition Data Source

I have also created a second promotional Content Item with a different Call to Action to get Users to sign-up to a Personalization Event. However I only want this Content to display to Users who have an understanding of Personalization. To do this I need to create a new condition.

Setting up a new condition

Before creating the condition, I first need to create a way to mark a user as a understanding Personalization. This is done by creating a new Persona Profile Key in the Marketing Centre.

Personalisation - new profile key

With this created its the matter of assigning this Personalization Guru Persona to a page which has content introducing the concept. This can be done via the Assign Profile Cards on the item such that when the user views that page he is given accumlative score in this Persona type.

Personalisation assinging button profile card

Its finally time to create the condition, in the Personalization modal for the Splash Panel sublayout I am able to select the second promotional content and choose the condition which displays it.

Personalisation rule set editor

In the this example I want a visitor who has a Personalization Guru score of 10 to see this second piece of content.

Personalisation guru rule

Datasource Code

Now that I have set up the Content and the Conditions in which it is passed to the SplashPanel Sublayout I need to write code to handle the value coming in via the Data Source field. This can achieved by accessing the field, retrieving the Sitecore Item Id in its value then making a call to the database for the Item.

The code below is a nice way to achieving this. I would recommend placing the DataSource property in a public place all your
Sublayouts can access, such as a UserControlBase which inherits from the default UserControl.

The markup for the panel will then make use of Sitecore’s components to display the appropriate content.

The User Experience

The result is that a User lands on the home page and the SplashPanel displayed the first Content Item. The User interacts with the Call to Action and is taken to a Page explaining the concepts of Personalization.

Home page default

The page is categorised as being related for the Personalization Guru with a value of 10 points. The User is automatically given this score in their Personalization Guru persona.

Personalisation Introduction page

Now when the User accesses the home page again the SplashPanel personalization runs the condition to check if the User has a Personalization Guru score of 10 or more. The condition is satisfied and the second Content Item is shown with the Call to Action to get this new Personalization Guru to attend an event.

Home page Personalised

And that’s it!

The guiding principles to let you loose on personalization and customise the experience your Sitecore users go through.

However, with great personalization comes great responsibility. Be sure not to go over the top with personalization as Search Engine indexers will only be able to view the default conditions so important content won’t be indexed if you’re not careful. Therefore use personalization to supplement the experience not form the entire basis of the experience.

The next topics I’ll cover are using personalization to change the components on the based on the roles of the Users’ account and how to test the effectiveness of your personalization.

Thanks to Matt for lending me his Css skills!


Sitecore Webforms for Marketers – Custom Field Validator MIME Type Sniffer

$
0
0

Update: I have since released this as a Sitecore Marketplace Module for download. Improvements I have made and the full source code are available in this recent blog post


MIME Type Custom Form Validator

I was recently working on methods to validate files uploaded by End Users and the usual recommendation of checking the file extension didn’t sit right with me, even more so when I found out that the .NET API ultimately just checks the File extension as well.

So the product a mornings work I’ve written a decent method of checking those upload files are what they say they are. In this case I created a Custom Sitecore WFFM Field Validator but its simple enough to port the code to custom web forms. Hopefully another dev will find this suitable as an alternative method.

FormCustomValidator

As the FileUpload control is a Sitecore Webforms for Marketers Form I need to create a WFFM custom Validator (jump to the section below to skip the Sitecore set-up).

The custom validator is created by a class that implements FormCustomValidator and overriding the EvaludateIsValid method. Within that method we want to retrieve FileUpload control that holds the file we want to validate, confirm a file is present and then pass it to a function to complete the various stages of validation.

Configuring a new validator in Sitecore requires creating a new BaseValidator Item under the default path of /sitecore/system/Modules/Web Forms for Marketers/Settings/Validation. You will want to enter your the assembly and class into the fields of the same name as well as a error message for when the validator returns false.

Finally to add the validator to validate the appropriate field, navigate to the field, under the default path of /sitecore/system/Modules/Web Forms for Marketers/Settings/Field Types, find the Field Type Item, in the Validator field select your new validator.

Mime Type Detection

Now that we have the file from the FileUpload field we need to validate we can go ahead and make a Mime Detection utilities class.

The class contains byte array properties relating to each type of file; pdf, docx, gif etc. The main function accepts a byte array of the file and then compares the arrangement against the properties, returning the mime type when a match is made. File extension does have some limited use, but only to improve accuracy of similar file types.

Having completed the complex part we need to wire up the ValidateMimeType method to use our new MimeUtilities – reading the byte array in the stream before passing it to get the Mime type.

With the return value from the GetMimeType method it’s now time to determine if the file should be uploaded or not. This is easily achieved via checking the identified Mime type is present in a collection of permitted file types. In this example, the field should only allow images therefore I created a list property holding png, gif, jpeg etc. If the file is present the method returns true.

This could easily be extended to allow a Content Editor to define via Sitecore which File types are allowed per field.

That’s pretty much all you need to implement a more robust way of sniffing out what files your users are really uploading to your site and putting a stop to it! There are other logical steps you may want to implement – identification and limiting repeat uploads or implementing a file size limitation. An example of the latter is shown below.

File size check

And that’s it!

Pretty nice way of implementing security of uploaded files; sniffing out those MIME types and throwing away files we don’t want. There are a few good posts about using Byte Array Sequencing around the net if you wanna read more.


Quick Start Guide: Dynamic Renderings and Components using Sitecore Personalisation Visitor Tags

$
0
0

Sitecore Personalization – Dynamic functionality

In past Quick Start Guides  I covered how to get Sitecore Personalization working and how to create dynamic content. This post will outline how to dynamically swap-out components and how Visitor Tags and .NET roles of users can be used to automatically show functionality and content most suited to them.

With recent versions of Sitecore personalization now encompasses components – allowing us to dynamically change the components on the page based on conditions met by the user. In real world terms we are able to automatically swap-out functionality on page for some other functionality that may be more appropriate or enticing for the visitor.

Enable personalization of component design

To enable personalization of components find your item in the Content Editor or Experience Editor and through Presentation Details select the component you wish to edit and click Personalize. In the Personalize the Component window check the Enable personalization of component design checkbox just under the header.

Enable personalization of component design

With this checked we are now able to swap not only the datasource but the component itself. This is completed by clicking the button below the component icon and choosing another component that we have built.

Select a rendering

Now using the rules engine we can set conditions so that when met the functionality and purpose of the page can be changed dynamically.

For example, a restaurant’s homepage may have a component to promote their locations, each location having a button for a user to check-in to say they are there. The Rules Engine can identify users who have checked in and on the next viewing of the homepage the locations component is replaced with a Leave a Review form.

So lets cover Visitor Tags and the rules we can apply to them.

Personalization through Visitor Tags

When a user first visits a site Sitecore creates a visitor record in the Analytics database. This record is then updated with that users actions on the site such as pages viewed, campaigns completed, profile data etc. To link the user to all subsequent visits to the site Sitecore creates two cookies on the user’s browser to uniquely identify them.

This requires very little set-up from a developer, simply have Sitecore Analytics working, as shown in my first post, and add a visitor identification tag to the header of your layout so Sitecore knows to track the session as the visitor is a real user or not if its an robot.

If using webforms add the tag like below

For MVC you will need to add the following code

Now we are tracking visitors we can use Sitecore API to add a Tag to a user when they submit the check-in button.

With the Tag to outline the visitor has checked in we can use a new rule in Sitecore’s RuleEngine to look for the Tag and retrieve it’s value to compare it to another value. If the values match the rule is met and the components are switched.

Where the specific tag of the visitor compares to value

User lands on the home page and ultimately clicking the Locate a restaurant panel.

restaurant locate

User clicks Check-in on the Cardiff location. On the next visit to the Homepage, the RulesEngine runs our VisitorTag rule whichis positive and swaps out the Locate a restaurant panel with a Review form for the Cardiff location.

restaurant review

Currently there are only two rules in the Rules Engine relating to Visitor Tags as of Sitecore 8 release 3. One to check if a Tag is present and another to compare its value. There are a lot of things developers could achieve its VisitorTags and the RulesEngine so I am in the process of writing some other useful rules for Profile Tags, such as comparison of Tag Values, Date Functions etc. I’ll update this blog when this is completed and on Sitecore Marketplace.

Anyways, Visitor Tags aren’t the only way to personalize both components and content; completing campaign goals, geographical location and .NET Membership roles can also be used. The latter often comes up in Sitecore forums so I’ll cover that next.

Personalization through User Roles

If your .NET roles exist within Sitecore’s own Membership database or you have a standard .NET Membership database linked to Sitecore via a Membership Provider and a Role Provider you will be able find them in Sitecore’s Role Manager and ultimately use them in personalization.

Sitecore Role Manager

Membership Roles are a standardised and robust way to group users logically so it makes sense we leverage that to show relevant content and functionality. In the same way that we personalized components earlier we can set the component to be displayed if the user is in a Role.

Where current user is member of the specific role

Components can even be hidden if the user is not logged in or any other condition for that matter.

Hide if anonymous

It may be tempting to give your Content Editors full control over security via this method however it is not substitution a for low level security – using technologies like .NET Membership and Sitecore’s Security Editor and Access Viewer is always the best option for security.

And that’s it!

Personalization of components using Visitor Tags, User Roles and the Rules Engine to dynamically change purpose of a page and the User experience with a little effort and know-how.

A consideration when using Personalization is that indexers will only be able to view the default state of the page. Therefore it is better to think of personalization as a way to enhance your site not the backbone of its functionality.


Sitecore 8 Content Testing – Add Tests to Workflow

$
0
0

How to Add Content Testing to Sitecore Workflow

To give the option to Content Test in workflow you need to create new Workflow Commands under a new or existing Workflow State, commonly the State before Item is publishable. In this example, the Content Test will be created on the Review State before the Item is moved to the Approved State for publishing.

Workflow Commands

First create two new Workflow Commands named ‘Approve with Test‘ and ‘Approve without Test‘ under the Workflow state that precedes the Publishable state.

The first Workflow Command is responsible for displaying the Test Editor to the User before ultimately moving the Item into the publishable State. The latter will remove all tests from the item and move it into the publishable state. To do this navigate to your workflow located under the folder at the path ‘/sitecore/system/Workflows‘ find the Workflow State, in this example Review.

Workflow Command Fields

Fields within a Workflow Command

In the new Workflow Commands add set both Next State fields to be the publishable State, e.g. Approved. For the ‘Approve with Test‘ Command set the Appearance Evaluator Type field to be the following class;

For the ‘Approve without Test‘ Workflow command add the following class to it’s Appearance Evaluator Type to the below

This is the Workflow we are aiming to achieve.

Sitecore Workflow with Content Testing

Workflow Actions

Now to wire-up the Test Editor so its displayed to the user when the Command ‘Approve with Test‘ is called. Right click on the ‘Approve with Test‘ Command click Insert from Template and choose the new Worfklow Action ‘Launch Create Test Dialog Action‘ located at the path ‘/sitecore/templates/System/Analytics/Testing/Workflow/Launch Create Test Dialog Action‘. The Action requires the following type in the Type string field;

A useful feature on this Action is the checkbox which will create a Suggested Test for the user is the wizard can not be displayed. This will use Sitecore’s automated testing to run tests it has determined to have the potential to add value to the Site.

Fields within a Workflow Action

Fields within a Workflow Action

Finally, for the ‘Approve without Test‘ State, create a Worfklow Action to delete any tests that may exist for the Item. Sitecore will handle this all for you by basing the Workflow Action on the ‘Template Remove Tests‘ Action located at the path ‘/sitecore/templates/System/Analytics/Testing/Workflow/Remove Tests Action‘ and the Type string field to be the value below. It is also worth using the delete the Test Definition to make your Test Lab clean of unwanted Tests.

The outcome of all your hard work will be displayed in the Workflow Chunk of the Review Tab will give the option to Approve with or without testing.

Sitecore Workflow Approve with Test

And that’s it!

That is all you have to do to enable Content Testing!

Get your Content Editors Testing what they are editing without a big change to their process. They can use your lovely new workflow to test the colour of that button they love so much.


Sitecore 8 Content Testing – Creating Multivariate and AB Tests

$
0
0

Sitecore 8 Content Testing

Anything with the codename Skynet immediately gets my attention so I dug into Sitecore’s Content Testing. Essentially Content Testing can learn from AB and Multivariate tests to suggest changes and create tests which can improve conversion rates, engagement values, site usage. So lets create some robotic Overlords!

What is Content Testing?

The principles of Sitecore’s Content Testing is to test everything, remove assumptions, learn what produces benefits, have fun while doing it then get Sitecore to do all the work for you. Tests can completed at three levels;

  1. Page Level Testing – Tests two or more pages, or versions of pages, against one another for the best outcome
  2. Component Testing – Measures value provided by differing components
  3. Content Testing – Measures value provided by differences in text, imagery, video etc.

Testing one of these ‘variables’ against another one is called an AB Test. For example, Promo Panel 1 and Promo Panel 2 will be added to different versions of the same page and Sitecore will measure the value generated by each over the duration of the test.

Sitecore AB Testing

A Multivariate test will consist of n number of variables; layout, content, components, personalization. For each combination of the variables Sitecore produces an Experience. Sitecore then tests each Experience and evaluate the value it generates to recommend which change the User should implement.

Sitecore Multivariate Testing

In this post I’ll cover what makes up a Content Test, the tools to manage them, where the data is stored and of course how to create a Content Test and use its outcome.

Firstly, a Sitecore Test consists of the following attributes

  • Variables – the Items, Components, Content, Personalization, Component tests which are being varied
  • Experience – a combination of the variables, ultimately what is being tested
  • Expected Effect – the test creator’s opinion if the test will produce a negative, positive or no change to the engagement value produced by the experience
  • Traffic Allocation – a percentage of the visitors that will be exposed to the test
  • Confidence Level – the statistical confidence percentage required before a result has been obtained
  • Test Objective – a measure in which the test is evaluated
  • End Test Options – the conditions when a test can end; automated or manual
  • Duration – the minimum time a test can run before a relevant result is obtained and the maximum time a test can run

There are two methods to create a Test.

Sitecore Experience Optimization

The Experience Optimization app has been created to manage all tests and their outcomes in one tool fully integrated into Sitecore, written in SPEAK and can be found on the Launch Pad.

Sitecore Experience Optimization

From the Experience Optimization Tool you can view Tests in all states; Draft, Active and Completed and once a number of tests have been completed Sitecore will have learned enough to begin displaying Suggested Tests. These Suggested Tests are what Sitecore has determined would be good changes to better achieve the goals, campaigns etc.

The stats of the gamification feature can also be accessed to see which User suggests changes that produce the highest effect, who accurately predicts results of tests and so on.

Most importantly, the Experience Optimization tools is where you create Page Tests. Page Tests in Sitecore is a method of creating AB tests for entire pages however you are not limited to only two pages. You can include number existing pages, previous versions of pages or create new page versions to run tests against. You can edit the Pages from the the Experience Optimization tool before you begin the test.

Sitecore Workflow Content Testing

The other method to create Tests in Sitecore is via Workflow. These differ from Tests created in the Experience Optimization Tool; opposed to testing pages and against each other you test variables on the Item you are pushing through workflow. These variables are components, content, personalization, layouts and even AB Tests on components which make up a Multivariate Test.

To create a Test via Workflow requires unique Workflow Commands to present the Test interface to the User and submit the test. Once a test has been created it will be present in the Experience Optimization Tool to track.

I’ve recently posted how to add Content Testing to existing workflow.

Location of Tests in Sitecore

When a Test is created an Item called a Test Definition Item is created to contain the attributes and is stored under the Test Lab in the Marketing Control Panel.

Sitecore Test Definition Item

This Test Definition Item is then linked to the Item in the test via the ‘Page level test set’ field within the Layout node of that Item.

Sitecore Page Test Location

A key consideration that Developers need to take note of. If the test includes more than one version of an Item, multiple versions of an Item will be present in the Web database. Until now only one version of an Item was ever present in the Web database.

Creating an Content Test in Sitecore

I’ll use an example to help explain how to create a Multivariate Test through Workflow. I chose Multivariate over Page Test as Page Tests follows the same process but simplified.

The first step is to create the variables. Add a new version of an Item by locking and then make your changes to the content, layout, components, personalization, component tests etc via the Experience Editor. After that it can be pushed through Workflow and begin creating the Multivariate Test. The interface will list out all variables that will be varied in the test based on the changes made to the new version of the Item.

Sitecore Multivariate Test

When creating AB Tests via the Experience Optimization tool you can include more pages to test against at this step, including previous item versions, new item versions and other existing items. Once chosen you can further edit the pages to Test against by clicking the Pencil Icon on each Page bringing up the Experience Editor. If prefer you can make the changes to the version in the Content Editor before accessing the Experience Optimization tool.

Sitecore Page Test Edit

The next step of configuring is the gameification where you can state if you believe the outcome of your changes will have a positive or negative effect on Engagement Value. Not only is this used for the gameification Leaderboards but Sitecore will learn which Users are suggest changes which have a negative effect on Engagement Value and react, for example showing the test to less visitors.

Content Test Expected Effect

Multivariate Tests will display all Experiences which will be tested and the variables that created them. At this point you can choose to Enable or Disable a variable from the test if you so wish. From my example eight Experiences will be tested.

Sitecore Versiables in Test Experiences Created

Sitecore will use historical data to inform how long it should take to determine which Experience is the winner.

The Traffic Allocation slider sets the percentage of visitors that will experience the Test when they access the applicable pages. Higher the allocation the bigger the sample size and in theory, the faster you will achieve a result. You may opt for a lower allocation if the change is risky, therefore only a small subset of the visitors will see it.

Content Test Traffic Allocation

The Confidence level list defines at what statistical confidence percentage needs to be achieved before deciding an Experience has come out as a winner. The higher the percentage the more certain result needs to be which could take significant time to achieve if at all.

Content Test Confidence Level

The Test Objective is used to measure how successful each Experience is. Therefore the Objective needs to be something that can be affected by users going through the Test Experience. Perhaps the Test affects users journey through the sales funnel ultimately leading to an order or maybe the test changes the content and layout of the account creation page. The former’s Test Objective would be the default Trailing Value per Visit and the latter’s would be Registrations.

Content Test Test Objective

This section also lets you define how a winner is a chosen; manually selected by a User or automatically by Sitecore.

The final setting of the Page Test is the duration measured in days. It is best practice to choose a reasonable minimum amount of time the test needs to run before a winner can be selected to ensure the sample size is large enough to produce representative results. A definitive maximum duration is required to prevent the test from running indefinitely, this is especially important when using the automated options for selecting a winning experience.

Content Test Duration

And that’s it.. for now!

Before this post becomes any longer I’ll split off into another future post concerning how to analyse your Test results and how to use Suggested Tests to do all the work for you.


Sitecore Policies and how to Show or Hide Publish Options for Users

$
0
0

Control Users Publishing Options via Sitecore Security Policies

As with most go-lives a showstopper ticket comes in just as you feel like you can finally go live. Fortunately the issue came in didn’t require a new release only some digging around in Sitecore and learning about a lesser known feature

No option to Republish, Publish Subitems or Publish Relating Items

The issue itself was pretty simple; Content Editors, in both Publish Item and Publish Site windows, were unable to see the options to Republish, Publish subitems and Publish related items. Understandably a high priority issue.

Sitecore Publish Publish Subitems missing

The issue hadn’t been caught in QA as our accounts are Administrators and correctly display the options. So knowing Sitecore it was clearly a role(s) permissions issue so I dug into the decompiled Sitecore.Client dll to find out what was required.

In the BuildPublishTypes function, within the PublishForm class of the Sitecore.Shell.Applications.Dialogs.Publish namespace I found something, something that I knew must exist but didn’t know what it was, dark matter Security Policy.

Sitecore Security Policy

Security Policy governs who can use various features within Sitecore. Opposed to managed individually, it is managed centrally via this Item.

The source of the issue is that the User, or rather their role(s), do not have Read access to the Security Policy Item in the Core database. In this case the Can Perform Republish Item,

There are a number of Policies for Publishing;

  • Can Perform Incremental Publish – Control the option to publish only changed items
  • Can Perform Republish – Control the option force publishing of Items, additional options to publish SubItems and Related items
  • Can Perform Smart Publish – Control the option to publish differences between source and target database
  • Can Publish Related Items – Control the ability to publish Items relating to the Item in Context

Policies aren’t limited to Publishing either. You can controls features of Logging into the Content Editor;

  • Can Boost – Control the ability to temporarily boost the number of active users allowed in the Content Editor
  • Can Kick – Use to prevent Users from kicking out others if the active users limit is reached

Features within the Experience Editor can be governed as well;

  • Can Design – Control who can use the designing options
  • Can Edit – Restrict who can use the Edit Options
  • Can Select Placeholder Settings – Control who can choose placeholder settings of components
  • Personalization – Control who can apply personalization rules to the Item, components etc
  • Testing – Control who can initiate Multivariate Tests
  • Keep lock after save – Give the option to keep the Item locked after the edit is saved
  • Can Edit (navigation) –  Control who can open the Item to edit in the Content Editor

Finally there are Policies for the Shell;

  • Can Switch Databases – Control who has the ability to jump between web, master and core.
  • Can Search – Control who can see the Search on the Start Bar

All useful things to consider especially for clients with large numbers of Content Editors. The Can Switch Databases can be really useful to allow some users to jump into the Web database to validate publishes.

The Solution – Applying Security Policies

The resolution to get the Republish, Publish Subitems and Publish Related Items is to give Read access to the Can Perform Republish Security Policy Item in the Core database.This is how all Security Policies can be applied.

Change to the Core database via the Desktop, open the Security Editor and select the Role you want to change.

There are two default publishing roles sitecore\Sitecore Client Publishing’ and sitecore\Sitecore Client Advanced Publishing‘ these are most likely the ones you will want to change unless you have custom roles or want to target a specific user.

With the Security Editor open navigate to the path ‘/sitecore/system/Settings/Security/Policies’ from there find the Items you want to change and tick Read access.

Publish Policy Security Editor

Read access granted to the Can Perform Republish the BuildPublishTypes method in the PublishForm class will detect the user has access to the Secure Policy and code will not add display:none the Republish Pane div (super secure!) and the Republish Options will display.

Sitecore Publish Window

What about Publish Site buttons?

For now it appears controlling who can see the Publish Site button in the Ribbon and the Start Menu are not controlled via Security Policy. There are controlled by giving Read access to the Items to the following items in the Core database

  • sitecore/Content/Applications/Content Editor/Menues/Publish/Publish site
  • sitecore/Content/Document and Settings/All Users/Start Menu/Left/Publish site

And that’s it!

The principle of Security Policies make sense and could be easily implemented in your own custom code; hiding Member features behind a Read access check to an Item in the Core database.

Makes it considerably easier for Clients to govern who has access to what features, run promos where access to a premium service is free for a weekend or even trail features with an automated task to remove Read access after 30 days. Ah, the fun that is Sitecore.


Sitecore Content Search – Creating a Custom DefaultIndexConfiguration

$
0
0

If you are seeing the following Exception when accessing the Index Manager in Sitecore it is likely you have errors within your Index configuration files.

Could not create instance of type: Sitecore.ContentSearch.LuceneProvider.Analyzers.DefaultPerFieldAnalyzer. No matching constructor was found.

The Source

The likely source of the issue is that a custom DefaultIndexConfiguration config file in the /App_Config/Includes/ folder is erroneous.

When creating the custom DefaultIndexConfiguration the likely developer copied the entire content of the Sitecore.ContentSearch.Lucene.DefaultIndexConfiguration.config file similarly to how you create a custom ContentSearch Index. However only a small subset of the DefaultIndexConfiguration.config is needed to create a custom one.

To identify which of your custom IndexConfigurations are causing the issue, besides opening and viewing the xml, remove them all from the Includes folder and add each one until the Index Manager throws the exception.

The Solution – Create a Custom DefaultIndexConfiguration file

Your custom IndexConfiguration file only need a few of the lines from the out-of-the-box Sitecore.ContentSearch.Lucene.DefaultIndexConfiguration.config or Sitecore.ContentSearch.Solr.DefaultIndexConfiguration.config, depending if you are using Lucene or Solr, to work. Below I have example of the minimum required to get your custom one working. This works for both Lucene and Solr for this example I am using Lucene.

You can swap out any of the required configuration settings for any custom configurations, types or analyzers you create.

If you need you can customise any area of the DefaultIndexConfiguration by copying the XML in and modifying it, such as Field Type Mapping, Computed Fields, Include and Exclude fields and more!

Finally don’t forget to reference your new custom index configuration in the indexes that should use them via the configuration xml node.

And that’s it

Resolved the Server Error on the Index Manager and created a custom IndexConfiguration.

Using a custom one really is valuable when you are having a highly bespoke search or only searching certain types of Items and/or small number of Fields. You can create really lean indexes vastly improving search performance.


Sitecore Marketplace Module – Secure File Upload for Webforms for Marketers

$
0
0

Secure File Upload – Restrict files uploaded via WFFM by Mime type and file size

At the beginning of the year I posted a blog on a secure way to validate uploaded files that goes beyond checking the file extension. I have since redeveloped it from the ground up to exist as a self-contained module which is now available on the Sitecore Marketplace for Sitecore 8 all the way back to 6.5;

https://marketplace.sitecore.net/Modules/S/Secure_File_Upload.aspx

The Module is a secure and robust way to ensure that users are only able to upload files of a certain type and within a certain file size. Preventing any malicious attacks and human error. The default File Upload existing within WFFM doesn’t limit the type of file uploaded nor its size.

Whats more the Module now allows Content Editors to define the allowed File Types and Size for each Webforms for Marketers Form the Secure File Upload Field is added too. Freeing the Field to be used in a variety of applications.

The module ships with 23 Mime Types already defined. Furthermore, as the Mime Types are now stored as Sitecore Items, new ones can be added to meet all File Types used by the Client.

Secure File Upload Field

The Module contains a new Custom Field Type for Webforms for Marketers – Secure File Upload. Once added to the Form there are a number of properties the Content Editor can change;

  • Upload To – Location in Sitecore where the Files will be stored once uploaded
  • Max file size – The maximum size the file can be in MB
  • Items – The folder containing all possible Mime Types to select
  • Selected Values – One or many Mime Types that are allowed to be uploaded

Secure File Upload Field

The Field implements the existing Sitecore.Form.UI.AdaptersFileUploadAdapter and ListItemsAdapter with significant modifications. Code to give control of the file size to the Content Editor and to handle if no size is provided.

The property to hold the list of Mime Types is defaulted to the File Types folder in Sitecore. The list’s Value property set to the Item’s ID, saving the Content Editor from searching for the folder each time and understanding that they must select the ID for the Value property.

File Type Validator

One of two validators in the Module, File Type Validator completes the Mime Type sniffing of the file and compares the findings against known Mime Types.

The validator retrieves the permitted file types from File Types selected in the Secure File Upload field. The selectedvalue property contains the Id of File Type Sitecore Items which hold the values needed for the comparison.

The File Type Item is a simple Template that contains fields for Mime Type, Byte Array Sequence of the mime type as a comma separated values and an optional File Extension to help with accuracy. By default they are installed a path within Webforms for Marketers /sitecore/system/Modules/Web Forms for Marketers/Settings/Meta data/File Types
File Type Item

From the collection of FileTypes chosen by the Content Editor the MimeTypeAllowed method loops through them and compares the uploaded file ByteArray for sequence matches.

File extension is used for further accuracy between similar Mime Types but is optional. If a file is matched to more than one Mime Type a match with the File Extension will be favoured.

File Size Validator

The File Size validator is as simple as the name suggests. It compares the size of the file uploaded to the size set against the Secure File Upload field. It could easily be applied to other fields providing they have a property of max file size.

If the limit is set left empty by the Content Editor any file size will be permitted.

And that’s it!

Content Editors given full control of the types of files and size their users upload on every form. Ensuring accuracy of what is being uploaded by their users and preventing malicious attacks. All that’s left if to use the default Captcha field to prevent automated attacks and everything is all good!

The full source code an be found on Github – https://github.com/islaytitans/FileUploadValidator


Sitecore Marketplace Module – Follow Field Target

$
0
0

Follow Field Target – Click through to the Item referenced by a Sitecore Field

Fed up the roundabout way of navigating to the Item referenced in one of Sitecore’s Link and List Field Types in the Content Editor I’ve built a concise Sitecore Marketplace Module that lets you click through to the Item the field is targeting.

https://marketplace.sitecore.net/Modules/F/Follow_Field_Target

Until now, the most effective way was to select Raw Values mode from the View Tab in the Ribbon, copy the field value, unselect Raw Values mode, paste the Guid into the Search box and press return.

Sitecore view Raw Values

Instead, the module I have build displays a Follow link directly above the Field which will take you straight to the Item and it supports all the major link and list field types in Sitecore;

  • Droplink
  • Grouped Droplink
  • Droplist
  • Grouped Droplist
  • Droptree
  • Treelist
  • Mulitlist

Follow Target of Sitecore Droplink Field

It even works well with Multilists, items selected in both columns

Follow Target of Sitecore Multilist Field

I have developed the module to be lightweight, only two code files, minimum impact and work natively within Sitecore so it can be added to all Sitecore instances to help with ease of use.

Droplink and Grouped Droplink

The module makes use of Sitecore’s Menu item template which is added beneath the Field Type definition Item in the Core database. This displays the Follow link above each field when added to an Item. On the click event a Custom Command is made passing the field’s Target value.

Droplink and Group Droplink store their Target value as the Item’s Id so it’s the matter of getting value and using Sitecore.Web.WebUtil.GetFormValue
to get the guid and directing the Content Editor to that Item by telling the Client to load that item;

Multilist and Treelist

Despite both Multilist and Treelist raw values are the Ids the WebUtil.GetFormValue method does not return the guid so they require significant more effort to work with.

The most effective approach I found is to use the Form being submitted by the click event in the HttpRequest. With the FieldId from the Command event we can loop through the parameters of the Form to find the Field matching that FieldId.

Sitecore Treelist Field

Oncethe correct field has been found we need to consider which Item has been selected by looking for a parameter matching the FieldId and either Selected or Unselected for a Mulitlist field or Selected and AllSelected for a Treelist field. This denotes which column contains the selected item.

Droplist and Grouped Droplist

As you would expect Droplist and Group Droplist are the hardest to build the Follow functionality for as they both have the Display Name of the Item as the selected value, not the Id. The display name really isn’t enough to go out and search the complete content tree to find the Item and redirect the user to it. There is only one possible one way we can definitely find the right Item – Field’s Source, so lets go get it.

Again, using the Form submitted in the click event of the HttpRequest I can loop through and select all fields on the Item that are a Droplist (or a Grouped Droplist). Once we have matching field types we need to consider that more than one Droplist (or Grouped Droplist) is present on the Item so we get a narrower list by selecting only fields whose Sources that contain an Item with that Display Name.

For our narrower list of Droplists (or Grouped Droplists) we need to parse each field’s Source. Again more scenario handling is needed as the Source could be an Item Id, Path or query. But fear note, the code handles it all!

With the source parsed we finally have a list of Strongly Typed Items, not just a display name! Now the easy part, loop through each field’s list of items to find the one matching the name and direct the user to their beloved Item!

And that’s it!

A nice little idea of useful functionality that at first glance is a really simple implementation but under the hood does have some magic to it. I’ll be adding this module to all my Sitecore instances, hope you enjoy!

Full source code is available on GitHub;

https://github.com/islaytitans/FollowTarget


How to extend Sitecore’s Experience Database

$
0
0

It’s about time we start doing with Experience Database. Out of the box, xDB is awesome for collecting general data such as name, address, contact details etc and that’s really useful. But how about we take it to another level; store specific information to the website, the client and the interactions of the visitor.

So lets visualise this with an example so its easier to apply to the real world. We have a website. Users can order samples through a purchase path. Download a swatch image of a product. Watch promotional videos.

Each of those interactions have a varying degree of value to the company. Being able to see and use which samples have been ordered by individual site visitors (called Contacts) will allow the company to target that user uniquely. Prompting them purchase the full product, review the sample, recommend similar and so on.

In conjunction with seeing which product ranges they have shown interest in by watching videos or downloading a swatch the company will be able to achieve one-to-one personalisation – improving user experience and hopefully more sales.

How to extend xDB

Okay, so we have the type of data, the interactions, we want to store in xDB and some idea of its attributes. We need to convert that into a format that xDB understands and line with MongoDB best practices on which it is based.

Contacts are stored in MongoDB in a Collection, essentially a list. Each Contact contains a number of Facets, typically a grouping of data by theme e.g. Addresses. Each Facet contains a number of Elements, essentially table of data e.g. Delivery Address. Then an Element contains Attributes, the data itself e.g. Address line 1.

In our example, we are storing website key interactions completed by a user. So we’ll create a Facet called KeyInteractions. We are storing samples ordered by the user, videos they viewed and swatch images downloaded so we’ll create an Element for each. This is how all that will look.

Sitecore Contact in xDB

How to create xDB Facets

Fortunately to achieve this all we need to work with is the Sitecore API. First we define an interface describing the Facet, then the containing Facet itself. The Facet class will implement that interface, Sitecore.Analytics.Model.Framework.Facet and define the elements it contains.

I recommend storing the facet name as a public property here so you can easily reference it in future. In the constructor we ensure that a Collection can be created for each of our interactions. As each interaction can be completed multiple times the Get methods use GetCollection returning a collection of xDB Elements. Finally add the Serializable tag to the class so it can be transmitted to for creation in Mongo.

How to create xDB Elements

Elements are constructed similarly to Facets. An interface describing the Element and a concrete class that implements that interface and Sitecore.Analytics.Model.Framework.Element.

The Elements for Sample Ordered and Swatch Downloaded will both hold two attributes, Range Id and Decor Id, that can be used by both Content Editor and system to find the Sample ordered or swatch downloaded by the user. The VideoPlayed Element will contain the Id of the Sitecore item containing the video and the video Url.

As with Facets the constructor of the Element should ensure our attributes can be created. For the setter of each Attribute we use the SetAttribute method to handle storing the name of the Attribute and its value in Mongo. The getter uses GetAttribute to retrieve the value.

For all this to be wired up we need to define our Facets and Elements in config. The default settings are within Sitecore.Analytics.Model.config file so I recommend patching them in as with all Sitecore configs. The config works in the same way those in Inversion of Control containers – define the interface and then the implementation. Our example settings look like this.

Storing custom data in xDB

We’re now set up to store custom data. So lets write code to pass data to those Facets and Elements and also retrieve it. The Repository Pattern is perfect for this. A single place responsible for accessing and writing your custom data and is easily swappable for testing etc.

I have created a Write method in the Repo that accepts the Contact and a model of the interactions that can be performed on the site. From the Contact we can retrieve the KeyInteractions Facet to begin writing to each individual Element.

The code above shows looping through each interaction contained in the model. If one is present, Create is called against the Element to create a new item in the list and then set it’s Attributes with the model data. Writing to xDB is as simple as that!

Kinda. How can we get that data from the interactions made by the User on the front-end of the site into the Repository to save it?

The best approach I have come up with is to create a MVC controller and for each interaction JavaScript takes the HTML 5 data attributes of the markup and Posts to the Controller. Those details are passed through the layers from the Controller to the Repository for writing.

While storing interactions. We may as well register Sitecore goals as the same time. It’s pretty straight forward, we will get some data showing in Sitecore Analytics and start assigning value to visitors of the site.

The markup of the button to download a swatch is above. The Range Code and Decor Code of the product in the image is used for the interaction. For the goal, the download a swatch goal Id and a description are defined.

On the button click event JavaScript reads the data attributes and passes them to the methods in the MVC Controller via a HTTP Post.

The PageEvent controller, implementing Sitecore.Web.Mvc.Controller, has a generic method for registering all goals. However, each interaction has its own method which accepts the interaction data, creates an entity and passes it to the Key Interactions repository.

Retrieve custom data from xDB

Our Repository is looking a bit one sided, we are only storing data, so lets add some code to retrieve it and put it to use.

Earlier we defined Get methods in our Facet and Elements that handle the retrieval from MongoDB, so that’s most of the work done. So to finish off the repository our Read method will utilise those and construct a model that can be used throughout the solution.

The main Get method uses smaller individual retrieval methods for the Elements to creates the return type. Those retrieval methods use the Sitecore API to get the Facet for the Contact and return the appropriate Element.

And that’s it

How to extend Sitecore’s Experience Database to store custom data – creating custom Facets, Elements and Attributes. But not just storing any old crap, actually useful information as to how each user interacts with the Website.

But wouldn’t it be nice if we could show all that highly valuable data to the Content Editor in a pretty and usable interface so they could it for personalisation, analytics and marketing? So my next blog will be on how to extend Sitecore’s Experience Profile.


How to Update Contacts in Sitecore xDB

$
0
0

This is a quick, short and sharp post covering how to add data to Contacts in xDB, specifically to the Facets and Elements that come with Sitecore out-of-the-box. This post is to provide additional info to that goes with recent posts covering how to identify and merge Contacts in xDB and how to extend xDB to store custom data.

To give an idea how this can be applied in the real world I am using the following example for this series of blogs. We have a website where Users can order products online. In the purchase path there is a form to collect base information so we can fulfill their order; name, contact info, address, email address etc. We will also use this information update users’ Contacts with the information to build a picture of who the site’s users are. This update will occur when the user clicks Next on the form – save us running the risk of them not making it to the end of the purchase path.

Updating Sitecore Contacts

Writing data from our Order form to the Contact’s out-of-the-box Facets is actually pretty simple. Get the Contact (I’ve covered an robust way to do this) and call GetFacet using the Interface of the type passing in the name of the Facet. Setting some personal details is as below. Note: its your call if you want to overwrite the data each time.

Writing to MongoDB Elements is that simple, but it gets more complex when dealing with lists of data like Collections. Lets use an example. In xDB Addresses Facet consists of a Collection for the addresses and an Attribute to define a Preferred Address. The same the Email Addresses Facet. So in our example we want an entry for our Shipping Address.

With the Addresses Facet in hand, create the entry for Shipping Address (if its not present already). If the entry doesn’t exist an error will occur. On the entry set the values to the address details the user entered in the form. I found it to be good practice to set the preferred entry of Facet to be the one we are creating if one has not already been set.

Once the Contact has been updated you can leave the write to MongoDB to occur when the user’s session ends or call SaveAndReleaseContactToXdb() to do it immediately.

And that’s it!

Adding data to the default Facets of an xDB Contact. It’s pretty simple really. As I mentioned, be sure to check out the two related posts to learn how to extend xDB to store custom data, how to handle identifying users and how to persist data when merging two Contacts together.


How to Identify and Merge Contacts in Sitecore xDB

$
0
0

In my previous post I explained how to extend Sitecore’s Experience Database so that you can store custom data against each Contact (visitor) of your site. I also recently posted about updating an xDB Contact with basic information. This post will explain how to uniquely identify Contacts from one another and how to merge Contacts, and their data, once you have determined that they are the same User.

To help understand how this can be applied for real clients I’ll use the following example. We have a website where Users can order products online. In the purchase path we have a form to collect base information so we can fulfill their order; name, contact info, address, email address etc. We will also use this information to identify them in xDB and update their Contact to illustrate who they are. This will occur when the user clicks Next on the form – save us running the risk of them not making it to the end of the purchase path.

Before we start. Lesson learned from a war wound. When interacting with the Contact use the Contact in the namespace Sitecore.Analytics.Tracker.Current.Session.Contact not Sitecore.Analytics.Tracker.Current.Contact. You want to make changes to the Contact loaded into Session so its correctly written to xDB on the Session.End event.

Identifying Sitecore Contacts

Sitecore xDB holds unidentified and identified Contacts. The difference is identified Contacts contain information that can be used distinguish them from other Contacts, typically an Email address but can be a username or UserId.

Identifying contacts is important as it allows the Contact to be tracking across multiple devices and browsers. There is also the added benefit of the email address being valuable to clients.  Sitecore can identify Contacts out-of-the-box using Email Experience Manager (EXM) and Webforms for Marketers (WFFM), when they open an email in the former and complete a form in the latter.

Identifying contacts can also be done in programmatically in code and is really simple to implement. Get the Contact, Sitecore will always ensure a User has one, then set the identifier to the email the User. Be sure to set the Contact.Identifiers.IdentificationLevel to Known.

Once the User’s Session ends, typically 20 minutes after their last action on the site, the Contact will be updated in xDB with its identifier.

That’s all well and good but what if the User already has a Contact that has been identified in xDB but now visiting on a new device? They would have two Contacts, one previously identified and a new one Sitecore loaded into Session. We would have just updated the new Contact with a duplicate identifier and all the data we have collected will be split between two Contacts. Therefore the correct approach to identifying Contacts is to check if the User already has an identified Contact.

So, whenever we interact with a Contact we should always check if a Contact already exists with that identifier. I have found the best way to implement this is creating a ContactFactory that is solely responsible for retrieving Contacts that can be acted upon by other areas of code.

The first step is to check if the identified Contact is already existing in the session. If it is not, use ContactRepository in the API to try to load a Contact with that identifier. If a Contact does not exist with that identifier then we’re clear to the unidentified one in session. However if one is returned we try to load the contact using the ContactManager in the API and return it.

Now we have implemented a consistent way to retrieve Contacts taking into account if the User has previously been identified in xDB we can use it throughout the code as simply as;

Some of you may have picked on on this already. If we retrieve a previously identified Contact from xDB and start using that. Then all interactions and data; pages viewed, goals completed, engagement plans etc the User made while still linked to their unidentified Contact will be lost. The solution, merge the Contacts.

Merging Contacts

Fortunately the Sitecore API is there to merge contacts. The first method is to use MergeContacts in the ContactRepository as shown below.

BUT! The data does get transferred from the dying Contact to the survivor however Sitecore.Analytics.Tracker still uses the dying Contact, assigning it’s interactions to it.

Therefore, to merge contacts use the method Identify passing in the identifier of the Contact e.g. Email address. The method will merge the unidentified Contact into the identified Contact. So we would implement it in our ContactFactory.cs just before the matchedContact variable is returned, see below.

However, if we have extended xDB to have custom Facets to hold extra data, the Pipeline which Sitecore.Analytics.Tracker.Current.Session.Identify ultimately triggers will not know how to merge our custom data.

Merging Contacts with custom facets

When you have extended xDB you need to consider how Sitecore will merge the data of two Contacts. Merging of contacts is handled by the MergeContacts pipeline within the Sitecore.Analytics.Pipelines namespace. You will need to replace the existing MergeContactFacets processor with a custom one that implements MergeContactProcessor. A reminder how to do that;

The existing MergeContactProcessor processor already does the work of copying all the default Facets so lets not reinvent the wheel and copy the decompiled code.

So copying the above into our custom processesor we need to extend it merge our custom facets. Inside the Process method we must capture the scenario where the Facet being processed is one of our custom facets checking for a match on the Facet name.

I think most developers will want to avoid using the method the ModelUtilities.DeepCopyFacet() in the API as it completely clears the data in the surviving Contact Facet before copying the dying Contact’s data in. Ultimately its for you as a developer to understand the your data and determine if it should be overwritten, merged or discarded and then develop code to achieve that.

So in my example I want to create a DeepCopyFacet() method of our own that doesn’t clear the data and appends the all data from the dying Contact’s Facet to the survivor’s. The method needs to handle the transferring of data stored in MongoDB Attributes, Elements, Dictionaries and nested Collections, which is the hardest part. The easiest part of all this is the actually moving of the data from one to another, see below.

And that’s it!

Identifying a Contact as soon as they hand over that piece of unique information. How to merge two Contacts together to consistently track users without loosing any interactions made or custom data saved. This is a big topic so I’ll add some useful links below for further reading.

Next post in this series will be how to extend the Sitecore Experience Profile. I was planning on doing it before this topic but it seemed more logical to cover this first.

Create and Save Contacts to and from xDB – Brian Pedersen

Identifying Contacts – Sitecore Docs

Merge Contacts – Sitecore Docs


Sitecore MVP 2016

$
0
0

A slightly different type of post today, the next entry in the series I am writing about extending xDB and Experience Profile is coming at the end of the week. Instead of the usual development guides, sample code and concepts its more of a “Good news everyone!

Sitecore has announced its Most Valuable Professionals (MVPs) for 2016 and with an insane amount of happiness that I can say I was one of those chosen. This quote by Lars Nielsen, Sitecore Co-founder, can explain the MVP award more succinctly more than I’m able to;

“The Sitecore MVP Award is given to exceptional community leaders who foster the free and objective exchange of knowledge by actively sharing their real-world expertise with users.”

There are 221 MVPs world wide split across three disciplines; Technology, Commerce and Digital Strategist. For me to receive the recognition of Technology MVP is nothing short of incredible. And in someways daunting – knowing the capabilities, contributions and, pretty much, genius of past and present MVPs.

Sitecore MVPs 2016

The full list of MVPs can be found here. There is a nice feeling seeing my brother’s name with mine in UK MVPs. There are really talented developers on the list and above that, they are genuinely nice people. One of the best things about being in the Sitecore community is the sense of inclusion and how connected you are with other developers regardless of location.

Sharing and writing this blog has made me a better developer and I get a huge amount of enjoyment out of it (not only from watching my site’s stats). I really hope my ramblings or experiences have helped someone out along the way.

So if you’ve read a post of mine, copied a code snippet, used a StackOverflow answer to solve a problem or installed one of my modules, cheers! Here’s to many more years!


Extending Sitecore’s Experience Profile – The Pipelines

$
0
0

Part 1 – ExperienceProfileContactViews Pipeline

I’ve been writing this series on Sitecore xDB, Contacts and the Experience Profile for a while now. I’ve been covering how to identify Contacts for Sitecore’s Experience Database (xDB) and how to extend xDB so it can hold custom data.

This time I’m going to explain how to surface that useful BIG DATA you extended xDB to hold so that it is accessible to Content Editors. This is a large topic so I’ll be splitting it between two posts, this first part will focus on the ExperienceProfileContactViewsPipeline which retrieves the data in a format that the Experience Profile can use.

It’s worth noting that I figured most of this out by just jumping into it, decompiling code and a reasonable amount trial and error. Just take that into consideration :)

Sitecore Experience Profile

So Sitecore’s Experience Profile is a dashboard that displays all information collected for every site visitor (called a Contact) and it comes out of the box with Sitecore 8 onwards.

The dashboard displays all Contacts in a searchable list and each can be drilled down into to see the detail of a Contact. As all Contacts are listed, potentially hundreds of thousands, distinguishing between each of them is a necessity – this is one of the benefits of identifying Contacts. This detailed view below is the Experience Profile.

Experience Profile Overview

The Experience Profile is used to show most, if not all, information in xDB about the Contact that Sitecore tracks by default. The data is split into logic areas and accessible through tabs.

The timeline gives chronological visual representation of the occurrence of visits, page views, goals etc. The right-hand summary section gives basic information of the Contact as well as their latest visit and overall visit stats.

The tabs offer more detailed information:

  • Overview displays the latest Events, Campaigns and Profile Cards matched.
  • Activity holds detailed breakdowns of visits, goals, engagement plans and search keywords.
  • Profiling shows the pattern matches to personas etc
  • Details list basic personal information, contact details addresses etc
  • Social holds their Facebook, Twitter, LinkedIn and for some reason Google+
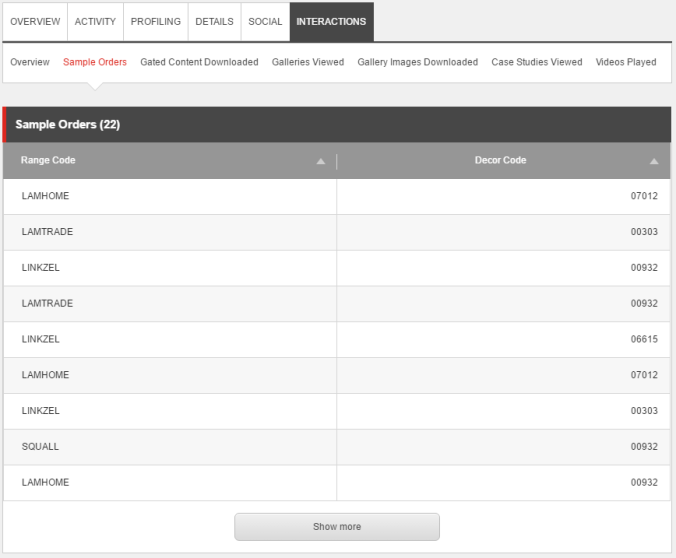
  • The Interactions is my custom tab which this post explains how to create

Display custom goals in Experience Profile

It’s worth me covering this quickly before we get into things. If you have created custom Goals, or any other Page Event, in Sitecore and you want them to display in the Experience Profile (I mean why wouldn’t you?) you will need to configure them to do so.

In the Content Editor navigate to the location Page Events are stored typically sitecore/system/Settings/Analytics/Page Events, open the Item relating the goal / page event, and scroll down to the Field section called ‘Experience Profile Options’.

There you will find checkboxes field Track as Latest Event and Show in Events to include these events in the Latest Events List and Events List in the Experience Profile. Check these and they will appear in their respective location. Also you can add an icon for your custom goal if you want.

Retrieve xDB data for Experience Profile

So getting the actual data to show in the Experience Profile is a little different from what you might expect. Essentially it all functions from groups of pipelines and data transformers. Namely ExperienceProfileContactViews and ExperienceProfileContactDataSourceQueries pipelines and the provider intelResultTransformers.

  • ExperienceProfileContactDataSourceQueries pipeline group actually quiries xDB for the Contact’s data
  • ExperienceProfileContactViews pipeline group is used to construct a data table and fill it with the data retrieved by the DataSourceQuery for an Experience Profile view
  • intelResultTransformers provider transforms the datatable into a format that works with the SPEAK interface of Experience Profile

I’ll continue using the same example from before to understand the real-world application. We have a website, Users can order samples through a purchase path. The sample order’s information is written xDB against the User’s Contact to show what they ordered.

ExperienceProfileContactViews

Each pipeline in the ExperienceProfileContactViews pipeline group consists of a number of processors. A processor to construct the DataTable , to initiate the ContactDataSourceQuery, to fill the DataTable with the retrieved data and default processors to allow paging and sorting of the data through the Experience Profile. Arranged via the following config file.

Our ConstructSampleOrdersDataTable processor, implementing ReportProcessorBase, creates a simple DataTable with a column added for each property of the sample order and a few things about the Contact and the Visit when the order was placed. These properties won’t need to be shown in the Experience Profile but are required for sorting etc

The next processor is a out-of-the-box processor, ExecuteReportingServerDatasourceQuery, which we tell to execute our sample orders query pipeline via a config param.This executes our custom ExperienceProfileContactDataSourceQueries pipeline processor. It probably goes without saying, ensure the correct spelling and casing of your processor when defining it as a param (sore subject).

This processor queries xDB for all the sample orders for the Contact we are viewing in the Experience Profile. I based the implementation on the existing queries that the Experience Profile and looks something like this.

However…

Issue alert

The default xDB Facets Elements exist as Arrays in MongoDB. However. The Elements we create with the Sitecore API, facet.ElementName.Create();, creates the Elements as Fields in MongoDB.

The upshot means that basing our query on the Sitecore existing code won’t work. After talking with Sitecore Support the most effective method I found to retrieve the data from xDB is by getting the Facet and the Element via the API:

I’m convinced there is a more suitable way, based on the reports in Sitecore.Analytics.Reports.StimulsoftIntegration.BuiltInFunctionsReportDataSource namespace. I’ll post an update if I do get somewhere with it.

So now we have a populated DataTable consisting of the results from our query. We need to use that DataTable to populate the one we created in the ConstructSampleOrdersDataTable processor so it can ultimately be presented to the user in the Experience Profile.

Almost there for the ExperienceProfileContactViews pipeline. We need to allow the Content Editor to sort and page through the sample orders in the Experience Profile. Adding the Sitecore.Cintel.Reporting.Processors.ApplySorting and Sitecore.Cintel.Reporting.Processors.ApplyPaging processors at the end of our pipeline will add additional properties to allow this. That finishes off the a finish off the pipeline.

IntelResultTransformers – a ResultTransformProvider

On the home stretch for retrieving the data for the Experience Profile. The last piece of code relates to transforming the DataTable into a more useful format. Namely add additional properties to the result set.

Our custom IntelResultTransformer to work on our Sample Orders DataTable is patched in as below, defining which View the Transformer relates by the ViewName property.

And the relating code is as follows, adding recency via the Visit’s start DateTime that the interaction occurred on. This is used for sorting on the Experience Profile interface.

And that’s not it!

This blog is large enough as it is without all the SPEAK stuff making it unwieldy. So I’ll make a logical break here. In Part 2 I’ll cover how to add to the SPEAK interface so the Experience Profile surfaces all the nice data we just handed it.


Extending Sitecore Experience Profile – The SPEAK App

$
0
0

Part 2 – The Experience Profile App

Sitecore’s Experience Profile shows a detailed breakdown of each Contact (visitor of the site) and is built using Sitecore’s SPEAK, so to modify the app it we are going need to use the Sitecore Rocks Visual Studio Extension. To refresh, here is an overview of what we’re trying to achieve.

We’re going to create a new Tab on the Experience Profile App for our Interaction Facet we built previously, the Tab will show the actions the User has completed on the site which are unique to the client. Within that Tab we have a collection of Sub Tabs, one for each Element of the Facet, e.g. Sample Orders, Videos Played etc. Then each Sub Tab has a Panel to display the data.

Helpful hint before we start

If you’re not too familiar with SPEAK I recommend you look at / copy the existing Activity Tab, rename and relink the items as I describe below as its similar to what we are aiming for. It’s also useful as a comparison or troubleshooting.

Creating a custom Experience Profile tab

In Sitecore Rocks connect to the Core database, Sitecore’s own apps are created from Sitecore Items in the Core. Navigate to the Experience Profile App, typically located at the path /sitecore/client/Applications/ExperienceProfile. We are interested in creating a new Tab on the Contact details Page, so navigate to the Tabs folder /sitecore/client/Applications/ExperienceProfile/Contact/PageSettings/Tabs.

Add a new Item to this folder based on the Tab Template, giving it a descriptive Name, ‘Interactions’ in this example. This is our custom tab, everything we create will be displayed when this tab is selected.

Under that Item create another based on the same template to act as the Panel which is displayed when clicking that tab, call it ‘InteractionsPanel’. Finally create a folder under the ‘Interactions’ Tab Item to hold all the Sub Tabs called ‘Interactions SubTabs’.

We want our new tab to look similar to the out-of-the-box ones so on the ‘Interaction’ Tab Item add the following renderings to the Layout – note the Id, Placeholder and Data Source properties:

Sitecore SPEAK Tab Layout

  1. Text rendering displays the text on the Tab by the Text property set to this Item’s Id.
  2. Border rendering adds a Border and Placeholder for other renderings to be added to this Interactions Tab.
  3. LoadOnDemandPanel loads an Item that acts as a Panel to hold the Sub Tabs. Set the LoadOnDemandPanel rendering’s ItemId property to this Item’s (‘Interaction’ Tab Item) Id.
  4. Image the image that is used for the loading icon
  5. ProgressIndicator show the loading indicators as the JavaScript executes. Datasourced to a default ProgressIndicator Item – {88134D50-FA78-406D-8C52-8286EB12BB25}.

For the ‘InteractionPanel’ Item, acting as the content of the Tab we just created, the Layout has the following Renderings;

InteractionsPanel Item

  1. SubPageCode is the JavaScript page code for this tab, this is covered shortly.
  2. Border rendering is used for a Placeholder of the following TabControl.
  3. TabControl rendering will hold the various Tabs for the Elements in the Interaction Facet i.e. Samples Ordered, Videos Watched etc. The rendering’s TabType property set to ‘SubTab’ so it is separate from the preexisting tabs. The Data Source property set to the folder we created earlier for the Sub Tabs.

The SubPageCode references a custom JavaScript file via the PageCodeScriptFileName property. We need to write a JavaScript to retrieve the SubTabs from the TabControl rendering, display them and when clicking on each that SubTab’s panel displays.

Okay so this is what we have achieved so far (I added five SubTab items to help visualise)

Experience Profile SubTabs

Creating a custom ListControl in Experience Profile

Under our SubTabs folder we’ll need to create a number of items for the Tabs, the Lists and the Columns of the list. We repeat this for every type of data we want to show. In this example I’ll create a ListControl to show data from an xDB Facet; a list of product samples ordered by this Contact.

Under the ‘Sub Tabs ‘folder add an Item using the Tab Template name it after the Element that holds the data in xDB, e.g. ‘SampleOrders’. Beneath this add the following Items. The first, ‘SampleOrderPanel ‘to hold the contents of the Tab and use the Tab Template. The second based on the AdvancedExpander Parameters Template titled ‘SampleOrdersAccordion’, I’ll explain its purpose shortly.

Add yet another new Item, this time beneath the ‘SampleOrderPanel’, a ListControl Template Item which will list the data, named ‘SampleOrders’. Below ListControl create a new an Item for each property of the data we want to show. In this example I want to show the Range Code and Decor Code of the sample ordered so the two Items will use the ColumnField Template. For each of those ColumnField Items set the DataField field to be the name of the xDB Attribute its to show e.g. ‘RangeCode’ and ‘DecorCode’ respectfully and make sure the Is Active field on those Items is set to true.

Note – Even though we want to order the ListControl data, we aren’t required to add those columns such as a datetime stamp.

Experience Profile custom items

Overview of the structure

The ‘SampleOrders’ Tab item will have the same renderings as the first ‘Interactions’ Item we created. Which makes sense as its just a tab which retrieves the content of the tab from another Item via the LoadOnDemandPanel.

Experience Profile Sub Tab

  1. Text rendering Text property set to this Item’s Id.
  2. Border rendering adds a Border and Placeholdeb
  3. LoadOnDemandPanel set the ItemId property to this Item’s (‘SampleOrders’ Tab Item) Id.
  4. Image for the loading icon
  5. ProgressIndicator Datasourced to a default ProgressIndicator Item again.

Okay, to get the ListControl displaying custom data. The renderings of the ‘SampleOrdersPanel’ Item are as follows:

SampleOrdersPanel Layout

  1. SubPageCode rendering which I’ll cover shortly
  2. The Border rendering adds a Placeholder for the other renderings.
  3. The MessageBar is used to display messages, as you would have guessed, its helpful as it also shows exception messages.
  4. AdvancedExpander datasources the ‘SampleOrdersAccordion’ Item we created earlier. The next four renderings are added to this AdvancedExpander‘s placeholder.
  5. The ListControl is responsible for displaying the data
    1. Set the Datasource the SampleOrders ListControl item
    2. Items field looks at the data provider to know what to display e.g. {Binding SampleOrdersDataProvider.cidata}. 
  6. ProgressIndicator displays a loading indicator for the ListControl
    1. Set it’s Target property to the Id of the ListControl
    2. IsBusy property is wired to the following GenericDataProvider e.g. {Binding SampleOrdersDataProvider.IsBusy} 
    3. Finally it datasourced to the out-of-the-box ProgressIndicator Item.
  7. GenericDataProvider actually holds the data we are loading and displaying. Datasourced to an Item called DataProviderForListControl – {6CD06869-4264-420C-A161-3220DD3AB7BA}
  8. Border adds a placeholder for a ‘see more’ button is more data is available than the page size.
    1. To set this conditional visibility set the IsVisible field to a property of the DataProvider denoting if there is more data available than the page – {Binding SampleOrdersDataProvider.HasMoreData}
  9. The Button facilitates pagination of the data, its Click event field set to a preexisting JavaScript Method – javascript:app.SampleOrdersDataProvider.nextListData().

Finally for the SubPageCode rendering. It references a custom JavaScript file that effectively wires up all the Renderings we’ve added, retrieve all the data from xDB from the Pipelines we created in the previous blog and passes it to the DataProvider.

And finally, this is what we have achieved

Sitecore Experience Profile Custom Tabs

Helpful hints

To help debugging etc you can access the data you are trying to display via Web API, it exists in the following format – <hostname>/sitecore/api/ao/v1/contacts/<id of the contact>/intel/<element name>. In my case I would use the following Url to view the sample orders of an Contact – jonathanrobbins/sitecore/api/ao/v1/contacts/bbf12b9f-876e-41eb-b3d7-bccd602d4886/intel/sampleorders.

If you are seeing the following error

Javascript - No pipeline was found for View [<table name>]

Ensure that the text AND casing of the tableName variable in the SubPageCode of the ListView  Item matches the exact name you gave to the matching ExperienceProfileContactViews pipeline. E.g. ‘sampleorders’

The Items you are creating in SPEAK have various different Fields you can use to control the text appearing in the Tab, the headers of the column of the ListControl. As I mentioned have a look at the existing Activities Tab to get an idea what controls what.

And that’s it!

That is how you store custom data in xDB, create pipelines to pull out the various Elements and Attributes and then display each in the Experience Profile. This tutorial covers one Element so you will need to repeat the steps for each Element you want to display.

I’d recommend you separate your custom Facets both from each other and the preexisting ones. Save headaches when it comes to upgrading Sitecore, changes to your own data etc.

There is so much to talk about on this topic, things I’ve done but not covered here. For example showing data that isn’t a list. So I’ll likely keep posting to hopefully help you out.


Display the Context of a Sitecore Goal in the Experience Profile

$
0
0

For a while now I’ve been writing about collecting and displaying data unique to a client in Sitecore’s Experience Profile. What went hand in hand with that is the use of Sitecore Goals and Outcomes – giving a business value, sometimes monetary, to actions performed on the site. The Experience Profile currently shows the goals for each Contact.

However, beyond the goal being registered we don’t know the context in which the goal was met. Wouldn’t it be great if we knew WHAT was added to the basket when the ‘Add to Basket’ goal was registered?

In my post extending xDB to show custom data I described how we can get that contextual data into xDB. I.e. a JavaScript function to initiate when an action is made by a User. Retrieving the contextual information from the markup of the page. Finally passing the goal and goal context to a MVC Controller to register it.

For example, a directory listing for a business’ employees. A goal is registered when the User clicks the ‘Call Now’ or ‘Email Now’ button to communicate with that member of staff. We will register the ‘Called Employee’ or ‘Emailed Employee’ goal but we can also include which employee contacted and the phone number or email address used.

But the Experience Profile doesn’t show this valuable contextual information even though its in xDB. So let’s do something about that.

Extending the Goals ExperienceProfileContactViews Pipeline

Back to the old ExperienceProfileContactViews Pipeline Groups. This time, we’re going to extend the Goals section to include two new pipelines. First, a pipeline to add an additional column to the DataTable to hold the Goal’s Context. Secondly, a pipeline to fill that column with data retrieved from xDB via a new DataSourceQuery, which we’ll get to shortly.

With me so far? Good.

Adding the column is as simple as below but needs to occur once the GoalsDataTable has been constructed by the appropriate pipeline.

Entering the context of the goal into that column is a little more work. Pulling apart the data in the QueryResult to get the goal context and entering it into our new column. This needs to occur after the existing pipeline which populates the goals with data from xDB.

The schema which files both reference is as follows

Retrieving Goal information from xDB

As you may know, the Goal Type is a PageEvent. PageEvents are stored in xDB against a Contact’s Interaction, not the Contact themselves. Which makes sense architecturally speaking. A Contact interacts with the site, that interaction includes a number of page views, a page view may result in a page event.

When registering a goal I use the Description property to hold the context of the goal. In this example, it would be the name of the Employee the user chose to contact and medium of the contact; phone number or email address. This is done by the following;

This Goal Description ends up in the Data property on the PageEventData type which is written to xDB (so we don’t have to worry about writing something custom there). So in order to retrieve it for our new column we need to query xDB. To do that we need to replace the existing Sitecore.Cintel.Reporting.ReportingServerDatasource.Goals.GetGoals type with our own.

Similar to the existing GetGoals type we are replacing, we are querying the Interactions Collection in xDB for entries matching the Contact’s Id we are currently viewing in the Experience Profile. We are asserting that at least one PageEvent exists in the Page.PageEvents property so we don’t get null PageEvents. Our query requests which Fields we want from the entry specifying the Pages_PageEvents_Data property which holds our goal context.

Almost there

The Experience Profile being built with SPEAK means to finish this off we need to do a bit. Fortunately, it is a very small bit. We simply need to add a new Item based on the ColumnField template in the Goals ListControl so that our new column displays in the list of Goals. Create this item under the path /sitecore/client/Applications/ExperienceProfile/Contact/PageSettings/Tabs/Activity/Activity Subtabs/Goals/GoalsPanel/Goals entering a sensible HeaderText and a DataField value that matches our schema name.

The result of our hard work;

Sitecore Goals Context

And that’s it!

A good effective improvement to the Goals area of the Sitecore Experience Profile. Give your Content Editors the what, why and how for when the User achieved the goal.

If you like this but don’t fancy doing work I’ll be submitting this as a Sitecore Marketplace Module shortly so you can just take it from there. I will update this post soon as its available for all!


Gated Content Sitecore Module

$
0
0

Quite a few of the clients I have worked with lately have asked about implementing Gated Content. Not Gated Pages – preventing access to pages requiring an account and roles but gated areas on an actual page. Essentially requiring a site visitor to give up some information about themselves before gaining access to some content.

This actually a good thing in Sitecore because we can request the visitor’s email address so that we can identify them in xDB. Meaning more and more of our Site visitors will be uniquely identified, tracked and ultimately targeted with personalised experiences.

Implementing Levelled Gated Content in Sitecore

Once the Module has been approved on the Sitecore Marketplace I’ll add a link here.

So how would we actually implement that in Sitecore? Let’s go through the user experience of gated content first.

A visitor comes to the site and navigates to a page that holds some valuable content – a white paper, imagery, text etc. The content is not presented, however, a form is displayed requesting some information about themselves. After providing that information the content is displayed to that user and they shouldn’t see the form on subsequent visits.

But let’s make things a bit tasty. Let’s say the client is keen for information so wants to dripfeed content to get more and more information out of the visitor.  We’re talking about Leveled Gated Access. E.g. providing an Email gets gains you access to Level 1 gated content, but if you want to see Level 2 gated content you’re gonna have to give up your gender and age. Then ultimately your soul.

Anyways. Let’s talk about this Module, starting with the form.

Custom WFFM Save Action

The form could be custom code but it makes much more sense to use Sitecore’s Webforms for Marketers. Allowing the Content Editors to control the fields on the form.

So we need to extend WFFM so that on submission of the form the user is marked as granted access to gated content. The version 1 of this module simply uses a cookie against the browser to outline that the User has provided the required information.

The lifespan of the cookie can be controlled in a setting in the config file of this module. Also, if you wish you use a different naming convention for the cookies you can provide your own Utilities class to do so.

To achieve the Levelling of Gated Access the module includes a second Save Action class, which marks the level of gated access the visitor can access. The Module ships with Level 1 and Level 2 but you can easily create any number of levels by copying the Save Action Item and updating the Parameter field with a new level.

Sitecore WFFM Save Action Parameters Field

The GrantLevelledGatedAccess Save Action differs from the previous GrantGatedAccess by retrieving the Level from the Parameters field and storing it in the value of the cookie.

Then its a matter of adding the Save Action from the Module to the form you want to use for gated content. E.g.

grant access to gated content save action

Ultimately, I have envisage the GrantLevelledGatedAccess can check the level the visitor is allowed to view. Whereas the GreantGatedAccess just checks if they have been granted access regardless of a level. They both use the same cookie. Both have value to a Content Editor.

Sitecore Rules for Gated Content

Now that we have a way to mark the visitor as being granted access to gated content we need to handle the dynamic showing / hiding of the form and the content itself. Sitecore’s rules engine and personalization are perfect for this.

The module ships with two new Sitecore personalization rules. The first, Grant Gated Access checks if the visitor has been granted gated access regardless of its level.

The rule is available for selection in the rules engine

When the visitor has been given access to gated content

The Levelled condition varies by letting the Content Editor set the gated level through the rules interface. The rule also allows conditional operators so the Content Editor can use logic like Gated Access Level must be equal to 3 or Gated Access Level must be equal to or greater than 2. Here’s the implementation.

Sitecore Levelled Gated Access Personalization Rule

Putting those Sitecore Personalization rules to use will achieve the dynamically hiding the form when the visitor has provided the required information as well as displaying the content (e.g. an image gallery, download links etc).

It can be set up so the form component is swapped for the content component. I.e. the form will be hidden and the content is shown when the user has the right gated access level.

Display Gated Content Sitecore Personalisation rule

This works great for visitors who previously filled out the form – they will never see the form and will have access to the Content immediately. However, visitors who just submitted the form will not see the content immediately after pressing the submit button as the personalization rule runs on the page initialise. The user will need to refresh the page to view their content. That’s a bit crap so I’ve made the Module help them out with that.

Custom Success Action Pipeline processor

The SuccessAction pipeline is executed when a valid successful submission occurs. I want to hook into that pipeline towards the end as to not break the existing processors. But it must be before the SuccessRedirect processor occurs which redirects the User to a Success Page (if the Content Editor has set one for the form). We still want to support Success Pages so we just need to factor it in.

The processor is pretty simple, redirecting the user to the current page so that the personalisation rules are run. However, we have two conditions. If the Form has a Success Page set up the processor must honour it by letting the subsequent processors execute. The Form must also have a Gated Content Save Action, i.e. the whole purpose of the reload, determined by the Save Action Id being present. If both conditions are met, we fresh the page.

As you may have noticed I’m pulling in the Id of the Gated Content Save Action from config. This supports you adding any number of Levelled Gated Access Save.

Using Gated Content WFFM Forms with xDB

So now that the client has locked down 90% of their site to users who have given their first-borns we can make use of those forms to identify and update Contacts in xDB. If you want to know more about identifying Contacts in xDB see here.

Webforms for Marketers comes with a Save Action to write to xDB which identifies the Contact as well as updates various facets. It’s the Update Contact Details save action. However, there are prerequisites. You need to use the Create User and Login User before the Update Contact Details and in that order. Making sure you edit the Create User and Login User to use the Email address field for the Username.

wffm save actions write to xdb

And that’s it!

That pretty much covers how to achieved Gated Content in Sitecore as well as going as far as levelling that gated access. As mentioned as soon as the Module is approved on the Sitecore Marketplace I’ll update this post with a link. The full source code is available here in the meantime – https://github.com/islaytitans/GatedContent .

It’s worth noting the Module is built on 8.1 which has a heavily refactored WFFM compared to earlier versions. If there are enough requests for it I’ll look into implementing it in pre-8.1.

I think the next step of this module is to assign the Gated Access flag against the Contact in xDB opposed to creating a cookie on the browser. But for now a really lean and smart way to achieving a highly desired feature. Any questions or issues give me a shout in the comments or via Twitter.


Sitecore Publishing Service – Setting up 8.2s new Publishing option

$
0
0

Sitecore 8.2 has been released and it brings a new option for publishing Sitecore Items – Sitecore Publishing Service. This is a feature that my brother Mike Robbins worked on and been so tight lipped about, so it only makes sense for me to dig in to see what it’s all about.

So why use the new Publishing Service? Simply put, it takes less time to publish items, especially large amounts, it is more reliable and provides better User Experience and feedback.

First off, rest easy – the old publishing process from prior versions still exists and is enabled by default. In order to switch your publishing to be handled by the new Sitecore Publishing Service, there are a number of installation steps that need to be completed. I’ll cover how you go about that.

Overview

To gain an insight how the new Sitecore Publishing Service works its best to quickly go over a few of its concepts;

  • Publishing Jobs – All publishes are handled via a job and added to a queue to be processed as soon as possible. Therefore the interface is no longer tied up by the publishing dialog. All current and recent publishes can be viewed in the Publishing Dashboard – no longer will you need to keep that dialog open to keep track / get feedback.
  • Manifests – The collective name for all the tasks the Publishing Service will complete, items that are valid to be published i.e. no publish / workflow restrictions etc are added to the Manifest. The complete manifest is determined at the start of the publishing process. Each publishing target will have its own Manifest.
  • Promotion – The process of moving the Items and Data described in the Manifest from the source to the target databases. Items are processed in batches, configurable in size, compared to the old Sitecore publish which published one Item at a time.
  • Manifests Results – The changes that were made as a result of promoting the manifest.
  • publishEndResultBatch pipeline – this pipeline is initiated at the end of the publishing job. This is the best place to customise the publishing process, more on that later.

Sitecore Publishing Service is made up of two components.

  1. Sitecore Publishing Host – service that runs independently from your Sitecore instance. It is responsible for processing the items that are to be published.
  2. Sitecore Publishing Service Module – Sitecore package containing the new UI Elements and configures a connection to the Publishing Host.

The Sitecore Publishing Host needs to be installed first and has a dependency on .NET Core. Additionally, Sitecore recommend running it under IIS which requires installing Windows Server Handling package. Let’s get those prerequisites solved first.

Installing .NET Core

Before installing Sitecore Publishing Service you will need to install .NET Core. If you don’t have .NET Core installed on the machine head to the following link https://www.microsoft.com/net/core. Find the download for your OS then run the installer.

Once installed you’re going to need initiate .NET Core via some commands in Command Line. Make sure you run CMD as Administrator. The commands you need to enter are outlined on the download page above. Once executed you will have installed .NET Core.

Installing Sitecore Publishing Host

First off, the official recommendation from Sitecore is to run the Service under IIS. In order to do that, Windows Service Hosting will need to be installed. Which can be found here – https://www.microsoft.com/net/download#core. Complete the install and you’re good to go.

Finally, let’s work on the Sitecore side of things. Head over to the download page of Sitecore Publishing Service and download the Host resource. This is the Service that will process our items we selected to publish.

There are two options to installing the Host; manual or scripted. Both are valid approaches but I’ll cover scripted here.

  • Extract the Sitecore Publishing Service Host zip somewhere you typically store IIS applications. Recommend naming the folder based on the instance we’ll be publishing for
    • e.g. C:\inetpub\wwwroot\sc82rev160729Publishing
  • In your website’s connection strings (not the Publishing Service’s) add the attribute MultipleActiveResultSets and set it to true on the databases involved in publishing typically Core, Master and Web
    • e.g. connectionString=”Data Source=(local)\SQLEXPRESS;Initial Catalog=sc82rev160729Sitecore_web;Integrated Security=False;User ID=sa;Password=password;MultipleActiveResultSets=True;” 
  • Now to create the connection strings for the Service. Open Powershell as Administrator and change the directory to the path of the service and run the following command (but change the connection string value).  It will create a custom file containing a connection string in the global folder
    • e.g.  .\configure.ps1 -connectionstring -key ‘master’ -value ‘user id=sa;password=password;data source=(local)\SQLEXPRESS;database=sc82rev160729Sitecore_master’
    • If you encounter the digitally signed error, right-click on the configure.ps1 file, properties then ‘Unblock’ and re-run
    • You’ll want to repeat or modify the file yourself to add connections for Web and Core database

If you prefer you can use the following xml config instead.

Note that all configs for Publishing Service should begin with the ‘sc.’ prefix so that they are included in the configuration.

  • Next set the service up in IIS via the following command
    • e.g. .\install.ps1 -sitename ‘sc82rev160729Publishing’ -appPoolName ‘sc82rev160729Publishing’ -port 80
  • Finally, run the schematool.exe to create a new publishing table in the specified databases

If you browse to http://<url of service>/api/publishing/operations/status/ you should see a response {“status”:0}. If not, there is likely an error with your connectionstrings or installs. Once resolved, perform an app recycle to flush the errors.

That’s the host set up. Now onto the Service.

Installing Sitecore Publishing Service

The Sitecore Publishing Service Module comes as a Sitecore package but does require manual changes once installed. Download the Sitecore Publishing Service Module from the Sitecore Site and install the package as you would any other Sitecore package.

Once the installation has been completed browse to your site’s includes folder to create a new Patch config which will override the default setting to tell your site the Url of the Publishing Host we created. See below

If you are configuring Content Delivery servers, ensure the dll Sitecore.Publishing.Service.Delivery.dll is present in the bin folder and that the file Sitecore.Publishing.Service.Delivery.config is present and enabled.

Give permission to full publish

A decision of Sitecore’s that I am happy about is that security of who has permission to perform a full republish is now controlled in a config file. You can’t grant permission to perform a full site publish to a user/role via the Security Roles in Sitecore anymore.

Meaning we should get less rogue Content Editors completing a full publish each time they change a single item. Awesome.

You can modify which roles can complete a full republish via the allowedFullPublishRoles setting in the Sitecore.Publishing.Service.config. You’ll need to define the role in the format domain\rolename. Recommend you patch this in as well.

Publishing, but faster

Now you’re all set up! Significantly more performant publishing achieved simply. Give it a try and you should see much-improved interface and feedback when publishing;

Sitecore Publishing Service added to queue

The publishing is so rapid, its pretty difficult to catch a Publish in the Active Jobs list. Good thing there is a Recent Jobs list, that’ll be handing to see how keeps kicking off a publish.

Sitecore Publishing Service Publishing Dashboard

Customising publishing – publishEndResultBatch 

As you might have guessed there are a number of new configs that the Publishing Service uses. In fact, it does not use any of the existing configurations for the out-of-the-box publishing. These new configs can be found in the App_Config/Includes folder beginning with Sitecore.Publishing.

If you want to add additional steps to publishing you will want to look at the publishEndResultBatch located in the Sitecore.Publishing.Service.config. This event pipeline is initialized after each batch of items have been published. The PublishEndResultBatchArgs will give you everything you need to access all the items from the batch. Meaning you can complete typical tasks of updating site maps etc.

And that’s it!

I may have been a little bias digging into the Publishing Service ahead of other new parts of 8.2 but the Sitecore Product Team and Mike have done a really great job. A few of our bigger clients complain about the performance of publishing 1000s of items in one go.

But it goes beyond the benefits of an improved publish. It’s about adopting and integrating .NET Core into the heart of Sitecore. Meaning everyone will feel the benefit of .NET Core and so soon. This really is an exciting time to be a .NET and Sitecore developer.

If you want further reading on the various configuration of the Publishing Service have a look at the official configuration document.


Viewing all 29 articles
Browse latest View live